Complete DIY Guide: How to Vinyl Wrap Your Car and Maintain Its Longevity
Vinyl car wrapping is a popular method for personalizing your vehicle, providing a fresh look, and even protecting your car's original paint. Whether you're looking to completely change the look of your car or want to protect the paint from scratches, UV rays, and minor chips, vinyl wrapping is a great option. This guide will take you through the entire process of vinyl wrapping your car yourself, from preparation to installation, and even maintenance, ensuring that your wrap stays looking brand new for years.
Table of Contents:
1. What is Vinyl Car Wrapping?
2. Why Choose Vinyl Wrap Over Repainting?
3. Tools and Materials You Will Need
4. Preparing Your Car for Vinyl Wrapping
5. Step-by-Step Guide to Vinyl Wrapping Your Car
6. Common Mistakes to Avoid During Installation
7. Post-Installation Care: How to Maintain Your Vinyl Wrap
8. How to Remove a Vinyl Wrap Safely
9. How Long Does Vinyl Wrap Last?
10. Final Thoughts and Tips for Long-Term Success

1. What is Vinyl Car Wrapping?
Vinyl car wrapping involves applying a thin layer of vinyl film over your vehicle’s existing paint. The film is adhesive-backed, which makes it easy to apply and remove without damaging the paint underneath. Car wraps are available in a wide range of colors, finishes (matte, glossy, satin), and textures (carbon fiber, brushed metal, etc.), allowing you to completely transform the look of your car without committing to a permanent change. It's an affordable and temporary solution compared to a full paint job, and it offers excellent protection against dirt, scratches, and UV damage.
---
2. Why Choose Vinyl Wrap Over Repainting?
There are several benefits to choosing vinyl wrapping over traditional car repainting:
• Cost-Effective: Vinyl wraps tend to be much cheaper than a professional paint job.
• Variety of Styles: Vinyl wraps come in countless colors, finishes, and textures, offering a level of customization that's difficult to match with paint.
• Easy to Remove: Unlike paint, which is permanent, vinyl wraps can be removed at any time without harming the car’s original paint.
• Protective Layer: Vinyl wraps can provide a protective barrier against UV rays, dirt, and minor scratches, helping to preserve the car’s paint underneath.
• Durability: High-quality vinyl wraps are designed to last for several years, often longer than a typical paint job when properly maintained.

3. Tools and Materials You Will Need
Before you begin the vinyl wrapping process, it’s essential to gather all the necessary tools and materials to ensure a smooth installation. Here’s what you will need:
• Vinyl Wrap Film: Choose a high-quality vinyl wrap that suits your desired look. Be sure to select a vinyl that’s durable and has UV protection.
• Squeegee: A squeegee helps to smooth out the vinyl and remove air bubbles during installation.
• Heat Gun: A heat gun will help you mold and stretch the vinyl over complex curves and edges.
• Utility Knife: A sharp utility knife is essential for trimming excess vinyl at the edges.
• Cleaning Supplies: Before applying the wrap, you’ll need to thoroughly clean your car’s surface using soap, water, and a degreaser to remove any dirt, grease, or wax.
• Measuring Tape: Accurate measurements will ensure the vinyl fits properly on your car.
• Tack Cloth: Use a tack cloth to remove dust and debris from the car’s surface before you apply the wrap.
• Vinyl Wrap Primer (Optional): Some car wraps require the application of a primer to ensure better adhesion, especially on textured surfaces or older cars.
---
4. Preparing Your Car for Vinyl Wrapping
Proper preparation is critical to achieving a smooth and professional finish with your vinyl wrap. Here’s how to prepare your car:
• Clean the Surface: Thoroughly wash your car using a mild car soap and water. Make sure to remove any dirt, grease, or wax using a degreaser. Any contaminants on the surface can affect the adhesion of the vinyl wrap.
• Dry the Car: After cleaning, ensure the car is completely dry before starting the wrapping process.
• Remove Any Parts That Are Not Being Wrapped: If possible, remove items like side mirrors, door handles, and trim pieces to make the wrapping process easier. This ensures that the vinyl wraps smoothly around all edges.
• Inspect for Imperfections: Check for any imperfections in the car’s surface (scratches, dents, etc.). Vinyl wraps won’t fix surface imperfections, so it’s best to repair these areas before proceeding.

5. Step-by-Step Guide to Vinyl Wrapping Your Car
Now that your car is prepared, it’s time to begin wrapping. Follow these steps carefully:
1. Measure and Cut the Vinyl: Measure the areas you’ll be wrapping and cut the vinyl wrap to the appropriate size, leaving extra material on the edges for trimming.
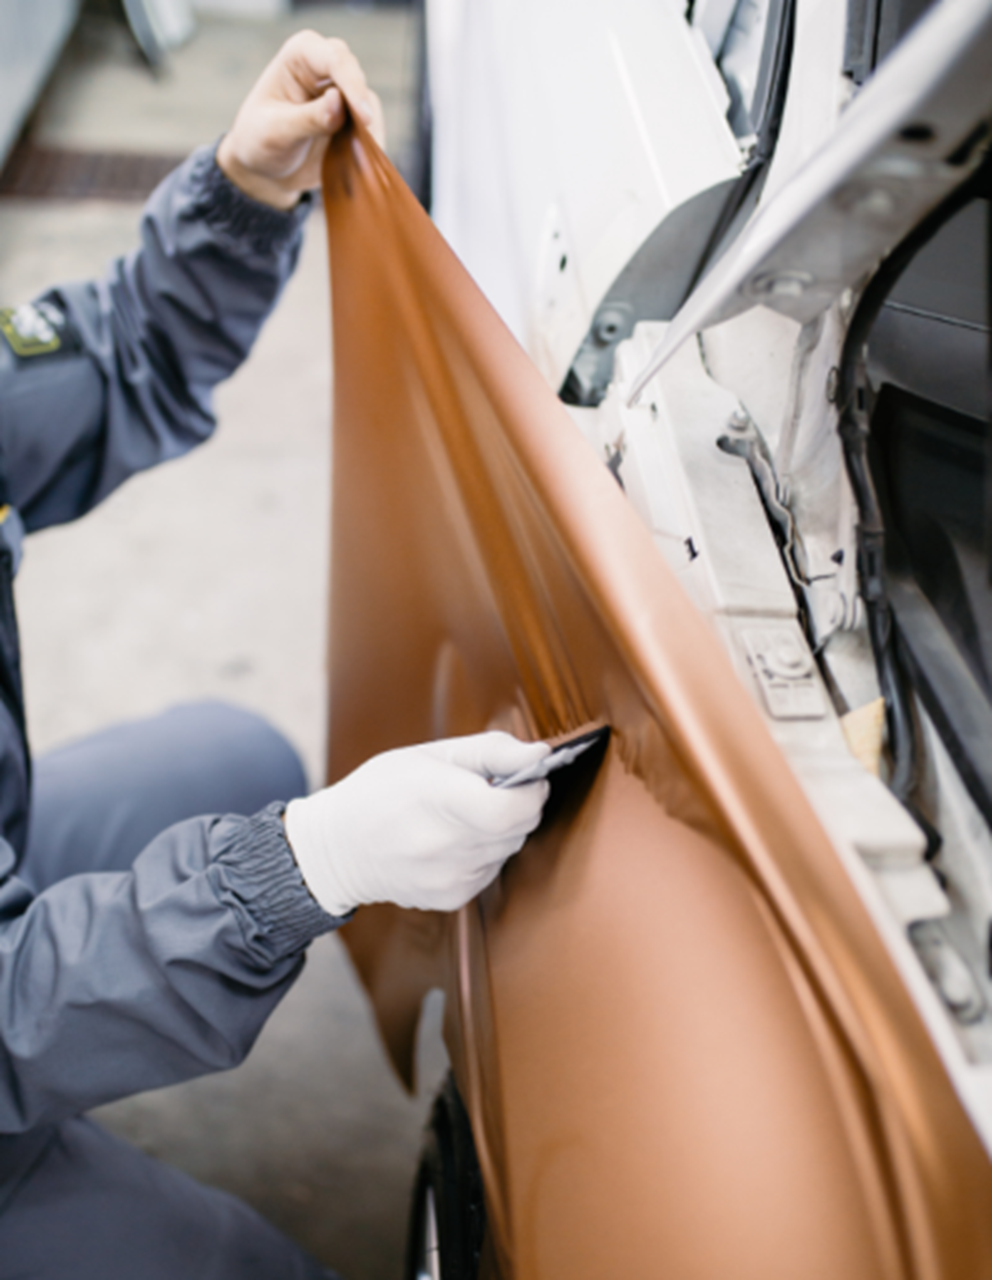
2. Apply the Vinyl to the Car: Start with one panel, such as the hood or a door. Peel the backing off the vinyl and apply it to the surface of the car. Use your hands or a squeegee to apply the vinyl, starting from the center and working outward to avoid air bubbles.
3. Stretch the Vinyl: Use a heat gun to soften the vinyl and make it more pliable. This will allow you to stretch the vinyl over curves, edges, and recesses on the car.
4. Smooth Out Bubbles and Wrinkles: As you apply the vinyl, use a squeegee to press out any air bubbles and wrinkles. Be patient during this step, as any imperfections will be visible once the vinyl is applied.
5. Trim the Excess Vinyl: Once the vinyl is applied, use a sharp utility knife to trim the excess vinyl around the edges. Make sure to trim closely to the car’s body, leaving a clean, neat edge.
6. Repeat for All Sections: Continue applying vinyl to the remaining sections of your car, ensuring each panel is perfectly aligned and free from wrinkles or bubbles.
---
6. Common Mistakes to Avoid During Installation
Vinyl wrapping can be tricky, especially for beginners. Here are some common mistakes to avoid:
• Not Cleaning the Surface Properly: Any dirt, grease, or wax left on the car will interfere with the adhesion of the vinyl.
• Using Low-Quality Vinyl: Cheap vinyl wraps are more prone to damage and may not adhere properly to the car’s surface.
• Over-Stretching the Vinyl: Stretching the vinyl too much can cause it to lose its shape, leading to wrinkles or distortions.
• Rushing the Process: Take your time to carefully apply each section of vinyl. Rushing can lead to mistakes and an uneven finish.
8. How to Remove a Vinyl Wrap Safely
If you ever decide to remove your vinyl wrap, here’s how to do it:
1. Heat the Vinyl: Use a heat gun to soften the vinyl. Start at one corner and gradually work your way across the vehicle.
2. Peel the Vinyl: Once the vinyl is heated, gently peel it off. Take your time to avoid tearing the vinyl or damaging the paint.
3. Clean the Surface: After the vinyl is removed, use adhesive remover to clean off any leftover glue residue. Wash and dry the car thoroughly.
---
9. How Long Does Vinyl Wrap Last?
A vinyl wrap can last anywhere from 3 to 7 years, depending on factors such as the quality of the vinyl, how well it’s maintained, and exposure to the elements. To maximize the lifespan of your wrap, follow the recommended care instructions and avoid harsh conditions that could damage the film.

10. Final Thoughts and Tips for Long-Term Success
Vinyl wrapping is a great way to personalize your car and protect its paint. With the right tools, materials, and a bit of patience, you can achieve professional-looking results right from your garage. Remember to follow the proper preparation and installation steps, avoid common mistakes, and maintain your wrap regularly to ensure it stays in great condition for years to come.
By following this guide, you'll be able to give your car a fresh, new look while maintaining the integrity of its original paint job. Enjoy the process, and most importantly, have fun transforming your car into a personalized work of art!